This second data set is much more complex than the first one. You should have a good grasp on how entering simple data works in order to understand this second example. Instead of letting SplitsTree calculate the differences between each item, we now define these differences ourselves and then enter this data matrix directly into the software.
Advantages:
- Allows for more complex data
- Better at quantifying the differences between different items
Disadvantages:
- More preparation needed
- Using the matrix data can be complicated
Before starting, please remember:
What we are basically doing here is scripting / programming. Therefore, syntax is case-sensitive, this means there is a difference between "BEGIN Taxa;" and "begin taxa;"!
Bold and underlined numbers and words indicate that you should change these values according to your own needs.
The first steps are exactly the same as the steps for simple data entry. For the sake of completeness, they are repeated.
Step 1
Start SplitsTree4 by clicking the corresponding desktop icon or use the corresponding start menu entry or the .exe file in the program folder.
Step 2
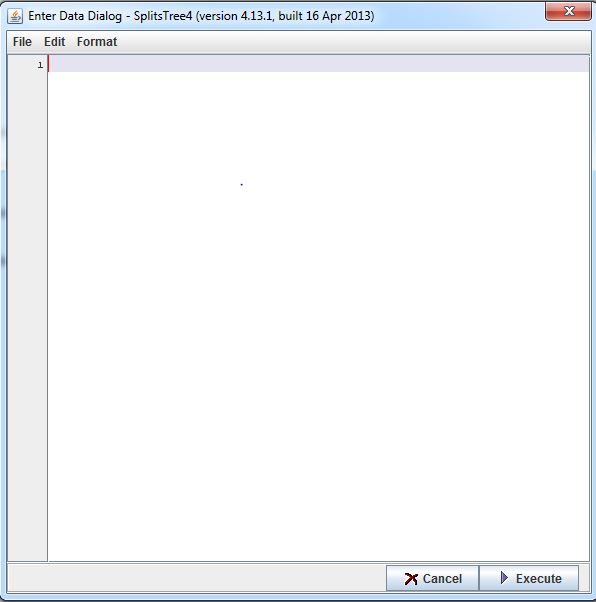
Click on file (upper left corner) and then on file entry. You are then presented with this window:
Enter the following:
______________________________
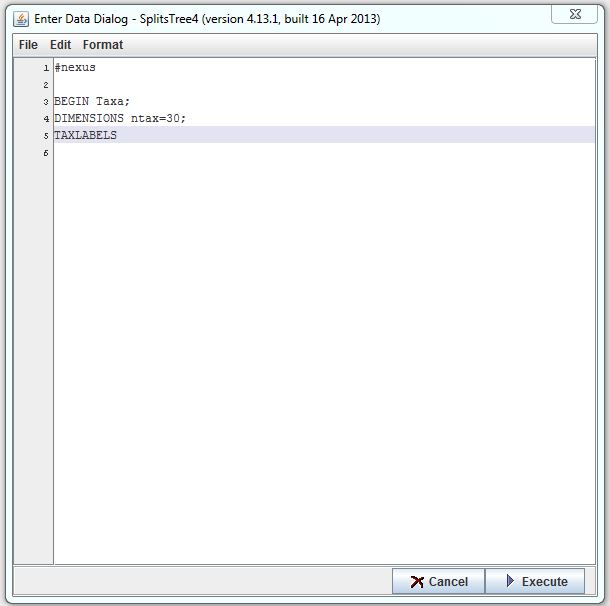
#nexus
BEGIN Taxa;
DIMENSIONS ntax=30;
TAXLABELS
______________________________
#nexus
This tells the program what the following part should be read as, in this case, a nexus file.
BEGIN Taxa;
This tells the program that the following information will include the number of items you wish to compare. The word taxa is a remnant of the program’s original use: bioinformatics.
DIMENSIONS ntax=6;
Here you specify the number of items you wish to compare. Replace the number '6', that is, the value of ntax with the number of different items you wish to compare with each other. Do not forget to put a semicolon after the number.
TAXLABELS
This part tells the program that the following information will include the name of the different items.
The entry window should now look like this:
Enter the following:
______________________________
[1] 'language_a'
[2] 'language_b'
[3] 'language_c'
[4] 'language_d'
[5] 'language_e'
[6] 'language_f'
[7] 'language_g'
[8] 'language_h'
[9] 'language_i'
[10] 'language_j'
[11] 'language_k'
[12] 'language_l'
[13] 'language_m'
[14] 'language_n'
[15] 'language_o'
[16] 'language_p'
[17] 'language_q'
[18] 'language_r'
[19] 'language_s'
[20] 'language_t'
[21] 'language_u'
[22] 'language_v'
[23] 'language_w'
[24] 'language_x'
[25] 'language_y'
[26] 'language_z'
[27] 'language_aa'
[28] 'language_ab'
[29] 'language_ac'
[30] 'language_ad'
;
END; [Taxa]
______________________________
[1] 'language_a'
[2] 'language_b'
[3] 'language_c'
[4] 'language_d'
[5] 'language_e'
[6] 'language_f'
(etc.)
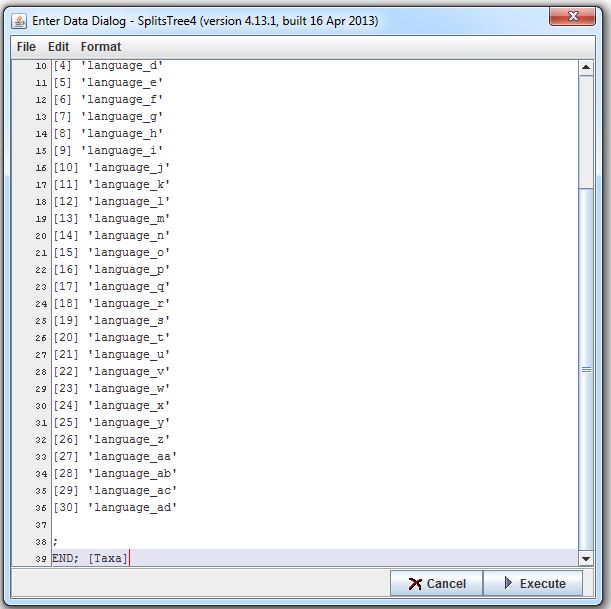
This part of the syntax tells the program which (unique) name corresponds with each variable. Please remember that the number of unique names specified here should coincide with the number of items set with the variable ntax in the previous step before. Also consider that the names should be placed in single quotation marks. Spaces should also be avoided: use the underscore instead.
;
END; [Taxa]
This tells the program that this part of the syntax now ends. Please remember to copy it accurately as both semicolons are needed.
The entry window should now look like this:
Step 5
Enter the following:
______________________________
BEGIN Distances;
DIMENSIONS ntax=30;
FORMAT labels=no diagonal triangle=upper;
MATRIX
______________________________
BEGIN Distances;
This command tells the software that the following part contains the distances between the items.
DIMENSIONS ntax=30;
This command repeats the number of different items. Note, that this number should be exactly the same as in Step 3.
FORMAT labels=no diagonal triangle=upper;
The first part of the command tells the software that the matrix has no labels. The second part tells the program that only the upper part of the matrix is being used. Because the relation between language_a and language_b is exactly the same as the relation between language_b and language_a this is not a problem, we can only use one half of the matrix. The other half is mirrored anyway.
MATRIX
This command tells the software that what follows next is the matrix itself.
Step 6
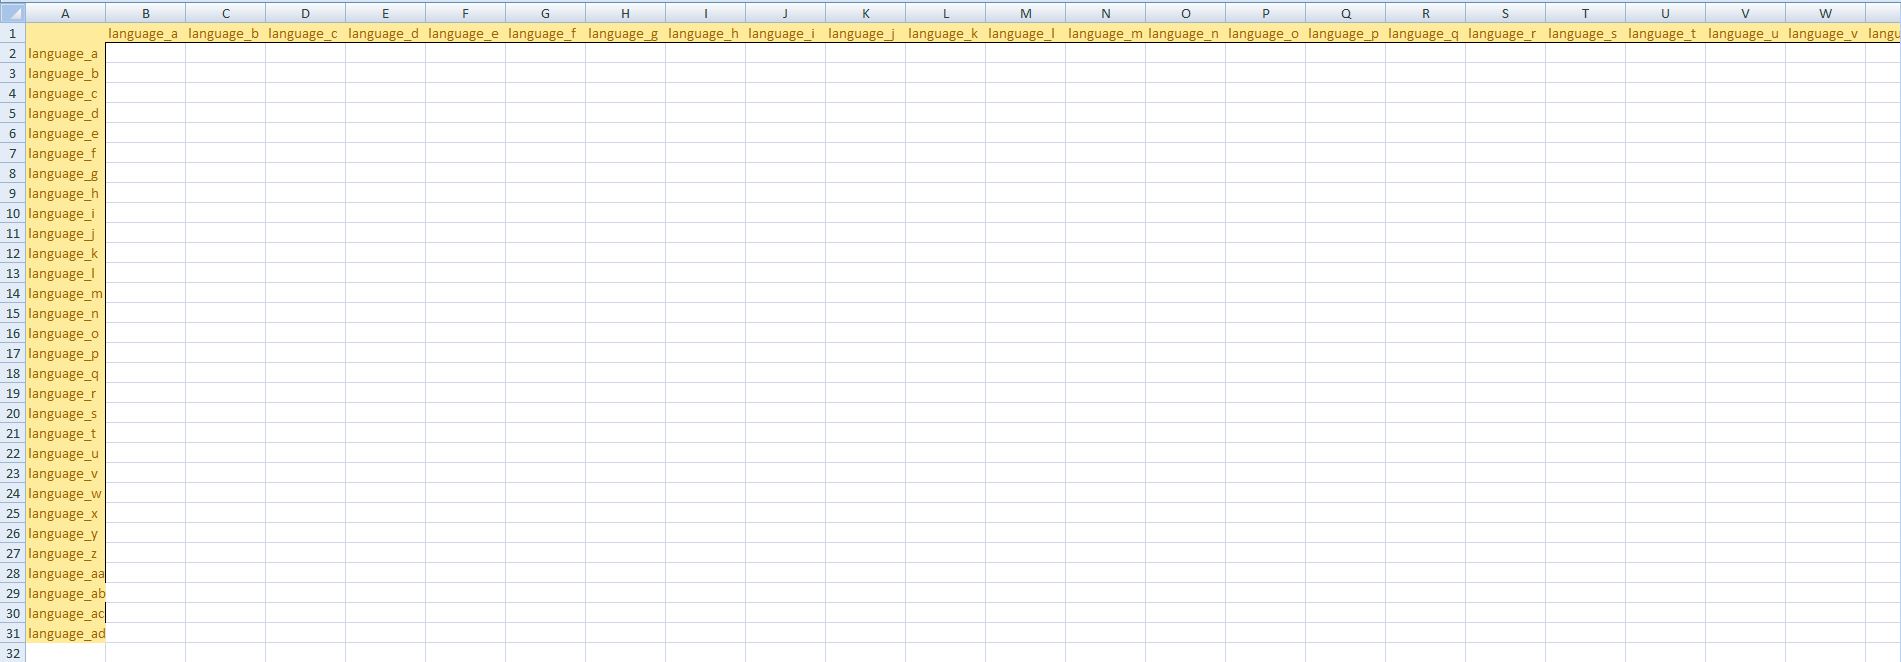
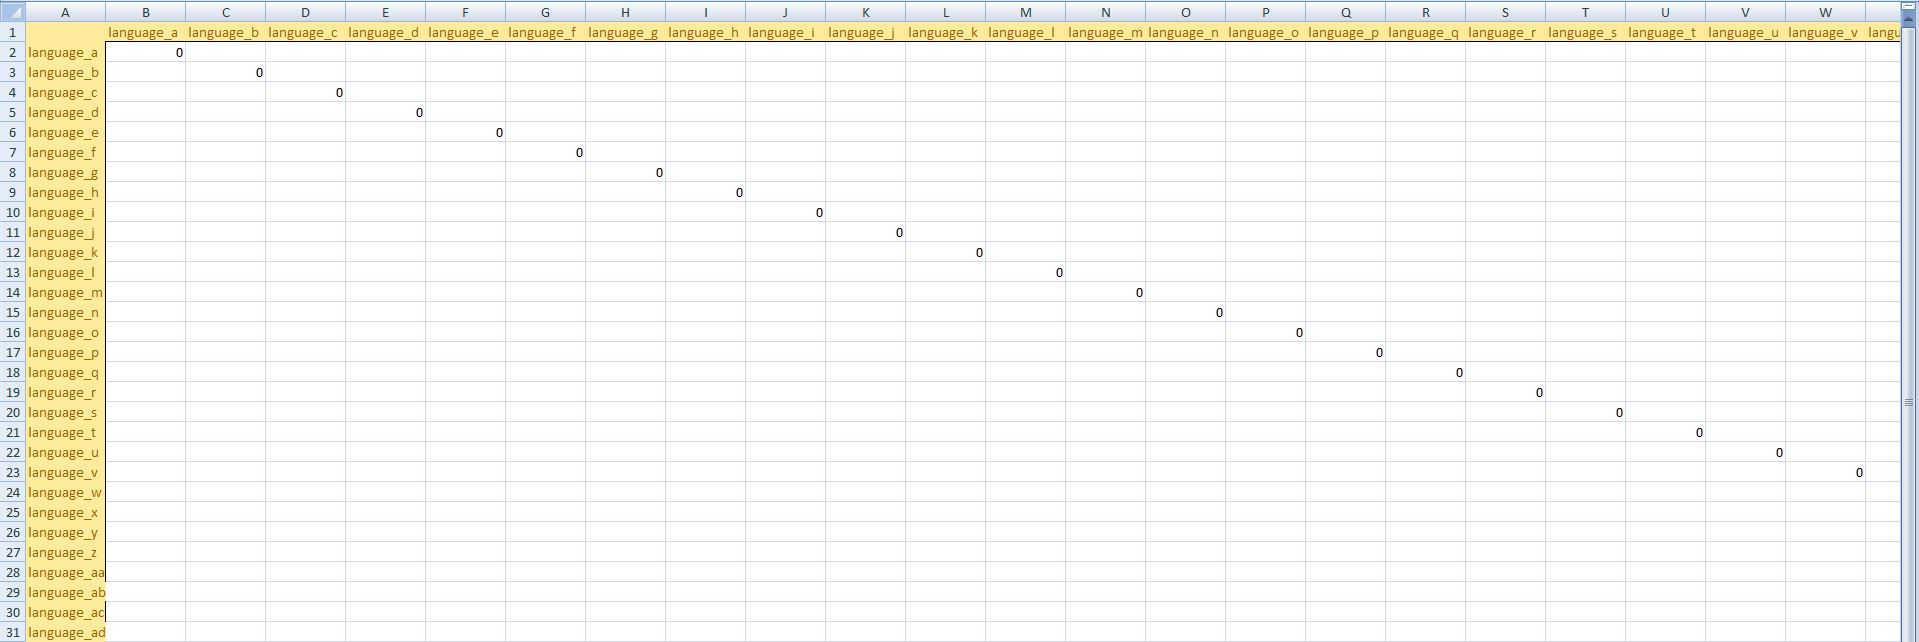
An easy way to format and layout a matrix that can be used in SplitsTree4 is to use a SpreadSheet program (like Google Spreadsheets, OpenOffice or MS Excel). Open the program of your choice and define some labels on the x-axis and y-axis in order to help you enter the data. Your file could look like this:
You can then add "0" at every location which compares a language with itself. Your file then could look like this:
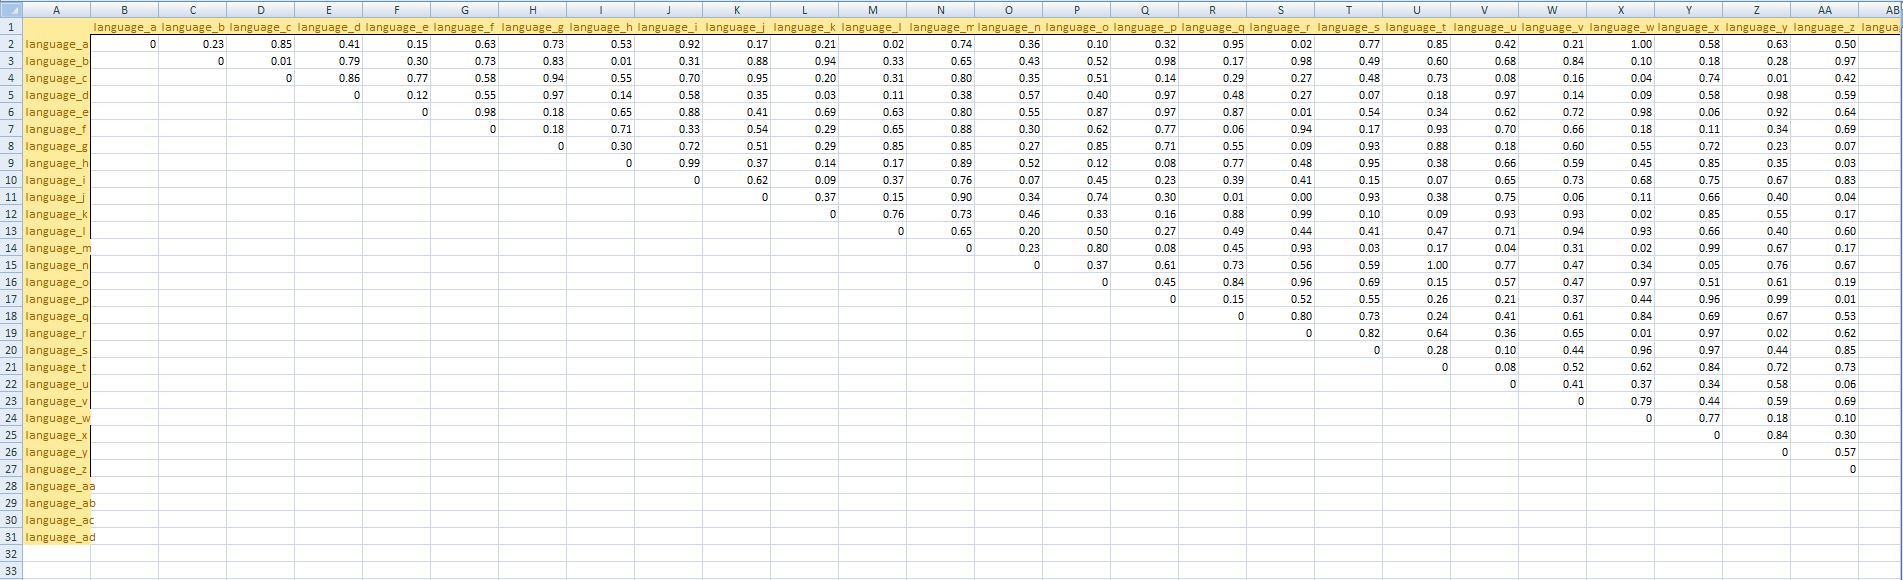
Now enter the respective distance (from 0 = similar to 1 = completely different) in each field. Your file then could look something like this (note that his example uses random numbers):
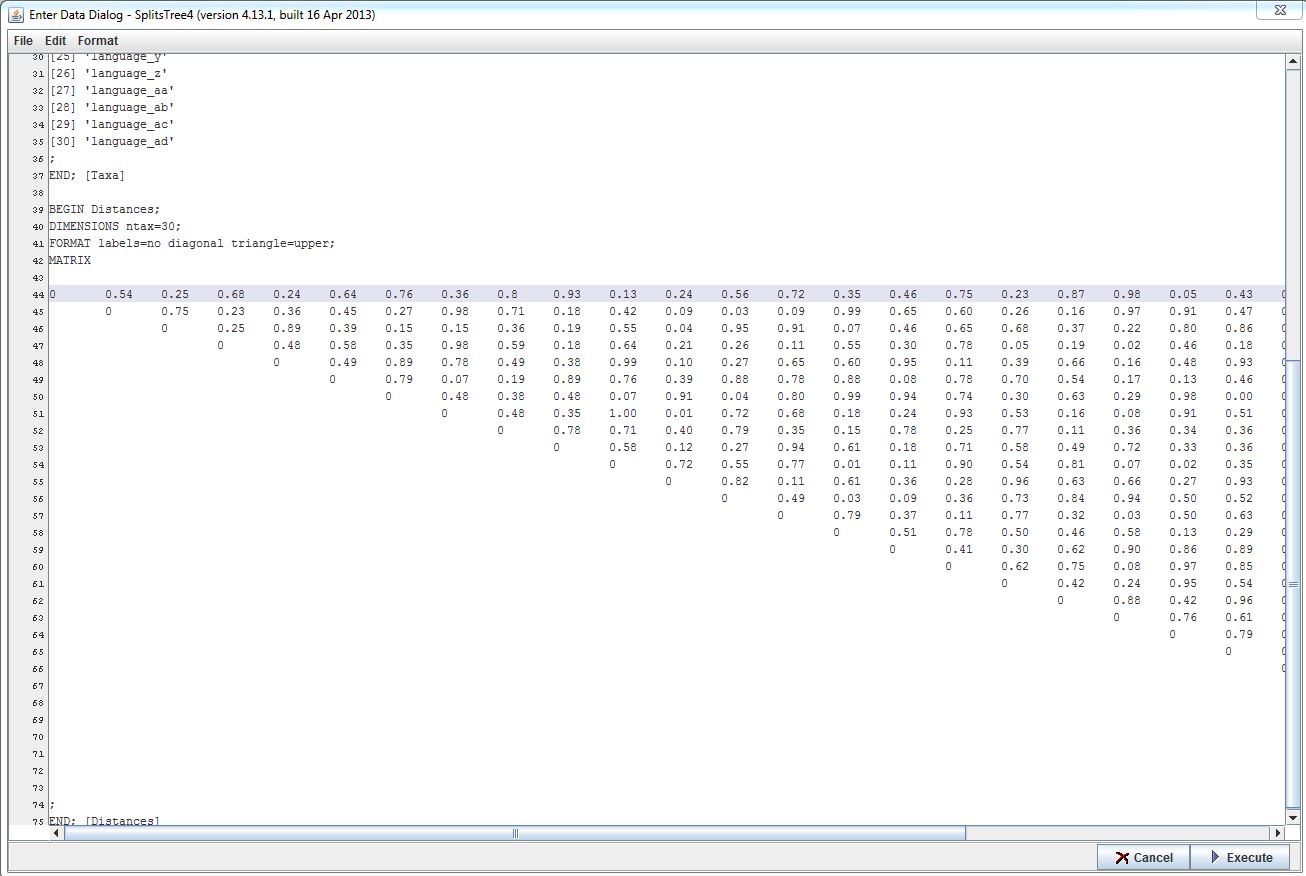
Now select the numbers and copy and paste them into your SplitsTree4 "Enter Data" window. The window should now look something like this:
Remember to finish the file with:
______________________________
;
END; [Distances]
______________________________
Press the execute button. If you get any error messages, please consider visiting the Troubleshooting page of this companion website.
Created with the Personal Edition of HelpNDoc: Free EPub and documentation generator